Many people tend to overspend from their Apple Pay account and then spend their nights in deep regret. Since Apple Pay eliminates the need for carrying cash, you don’t actually “feel” like you’re spending money on something. So, it’s understandable to spend a few dollars more than your estimations. The good thing is that you can see Apple Pay history on your iPhone, iPad, Mac, or Apple Watch.
Tracking your transactions and spending on Apple Pay enables you to keep a check on all your activities. When you see you’re spending more than anticipated, you can start saving money to stay within your budget at the end of the month. That’s super handy, right? This feature also lets you identify suspicious transactions initiated from your Apple Pay account.
Apple Pay enables you to see the history of a particular transaction in the Wallet app for the next 12 months. You will need a Touch ID for your Apple Watch and iPhone.
Let’s show you how to see your Apple Pay history on your device!
Method #1: Using an iPhone or Apple Watch
Before we jump onto the steps for viewing Apple Pay history, it’s vital to understand a few important things. You can only see Apple Pay history on the device you initiated the transaction from. If you used a credit or debit card for your payments, you may see them on all the devices linked to your Apple Pay account and Apple Cash Card.
Apple Pay history is visible on an Apple Watch, iPhone, or Mac. The process is the same on an iPhone or Apple Watch, while macOS involves a few more steps.
Let’s learn how to see the history of Apple Pay transactions on your iPhone and Apple Watch.
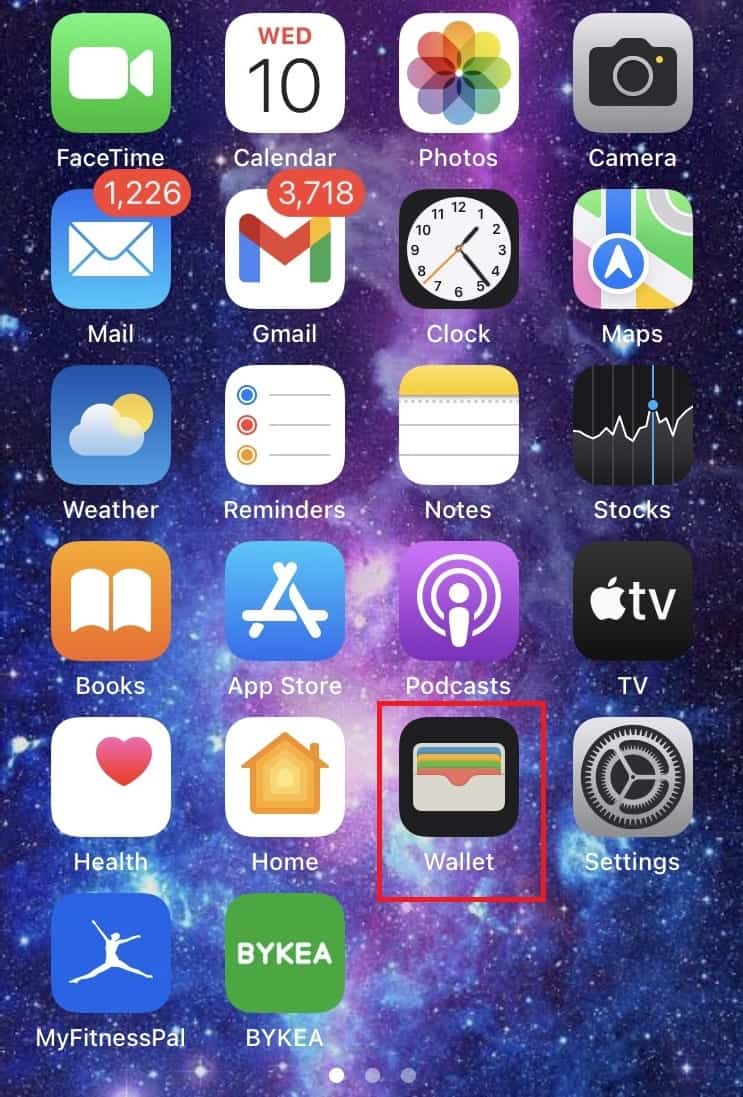
Step 1: Open the Wallet App
Start by launching the Wallet app on your iPhone, which is included by default on iPhones.
Apple Pay doesn’t have a dedicated app — your account is connected to Apple Wallet. You can access your Apple Pay account and Apple Cash Card from the Wallet app.
©History-Computer.com
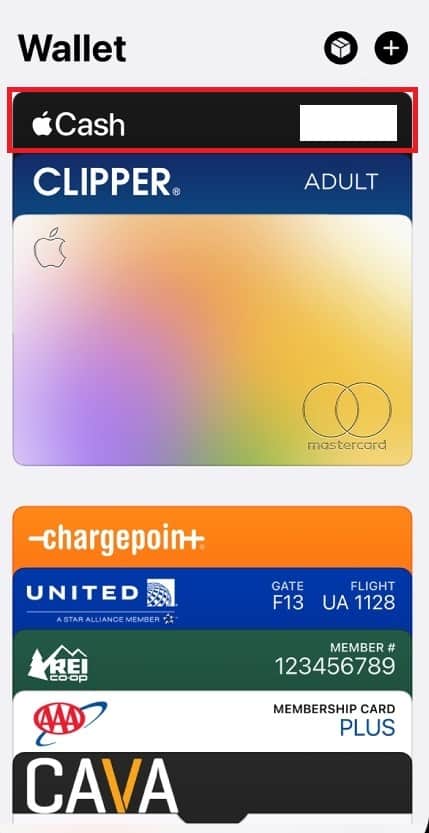
Step 2: Choose the Apple Cash Card
On the app’s homepage, you will see all your cards linked to Wallet. Tap on the Cash Card or whichever card you’d like to check to view all the transactions you’ve initiated in the past few days.
©History-Computer.com
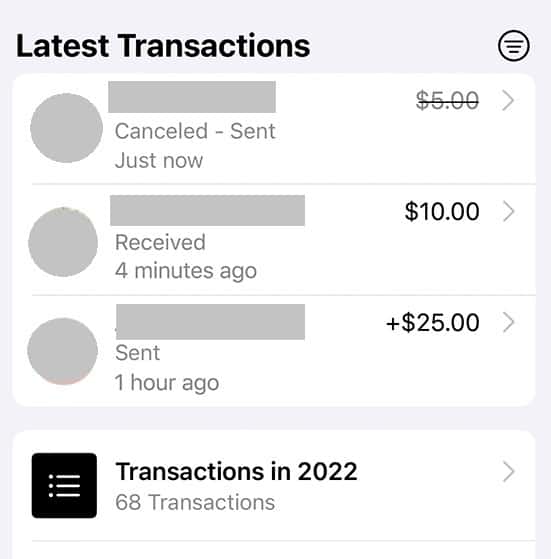
Step 3: Tap on a Transaction
You can now choose any transaction to see its complete details, including the amount you sent, time, day, and more. You can also report an issue about the payment if you didn’t initiate it or it didn’t send successfully.
That’s it! You can now see Apple Pay history on your iPhone or Apple Watch.
©History-Computer.com
Method #2: Using a Mac or iPad
You can also view your Apple Pay transaction history on your iPad and Mac. The process is pretty similar to the iPhone and Apple Watch process.
Here is how to see your Apple Pay transaction history on an iPad or Mac!
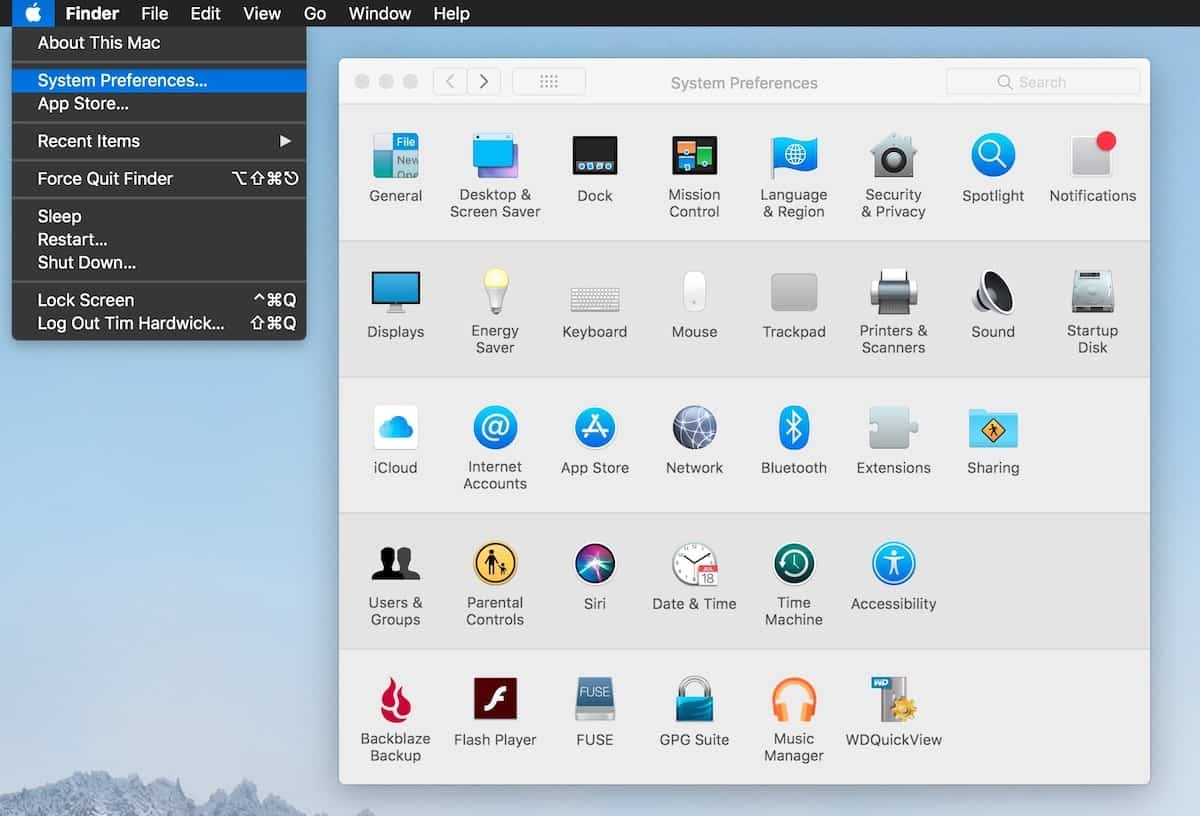
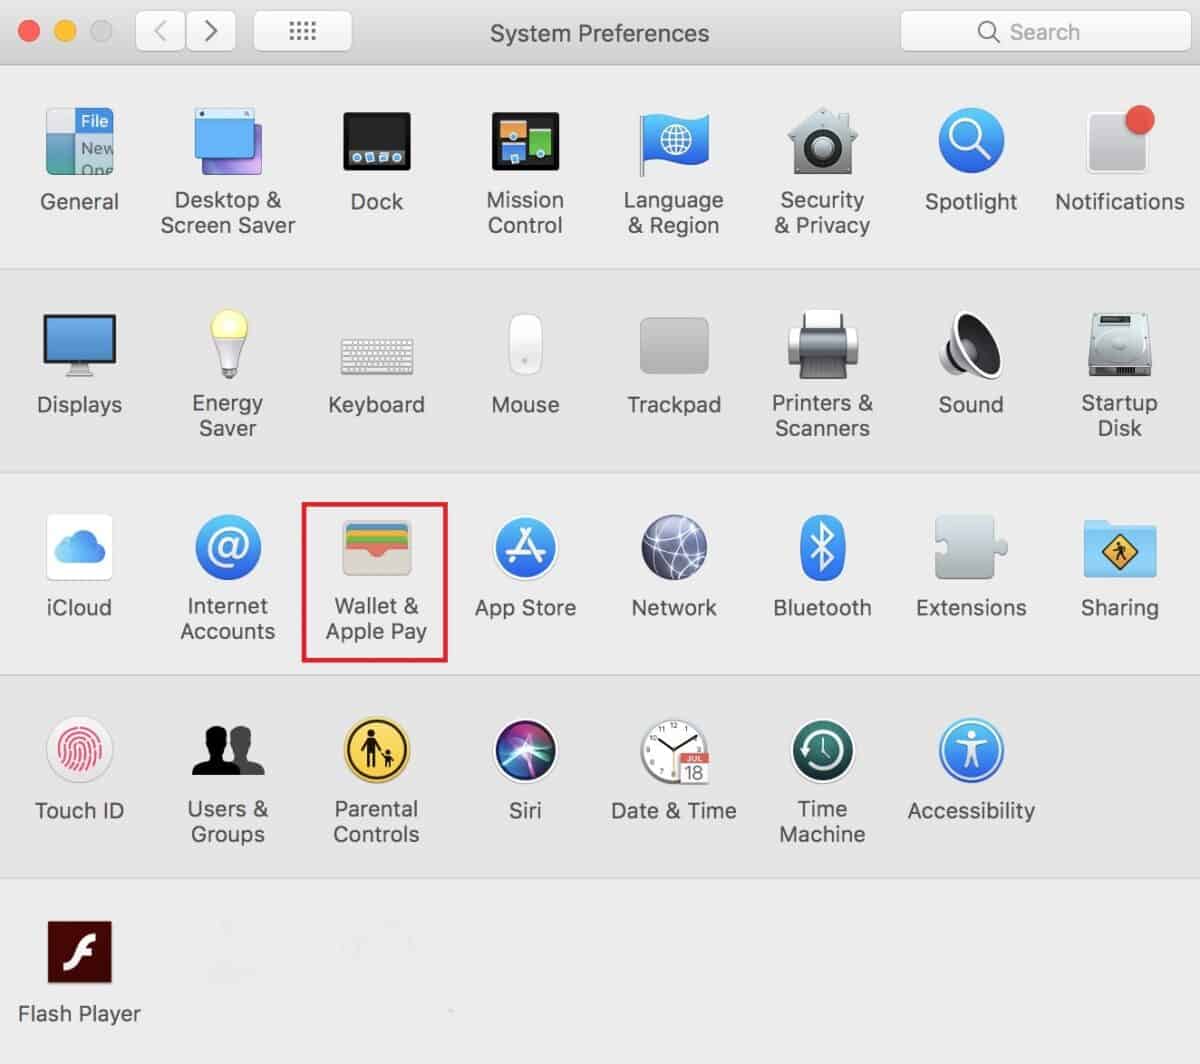
Step 1: Open System Preferences
Open Wallet on your Mac or iPad and access its settings.
If you have a Mac with Touch ID, head to System Preferences. On the iPad, open Settings to proceed.
©History-Computer.com
Step 2: Launch Wallet & Apple Pay
From System Preferences on Mac or Settings on iPad, choose Wallet & Apple Pay and wait for the homepage to load.
©History-Computer.com
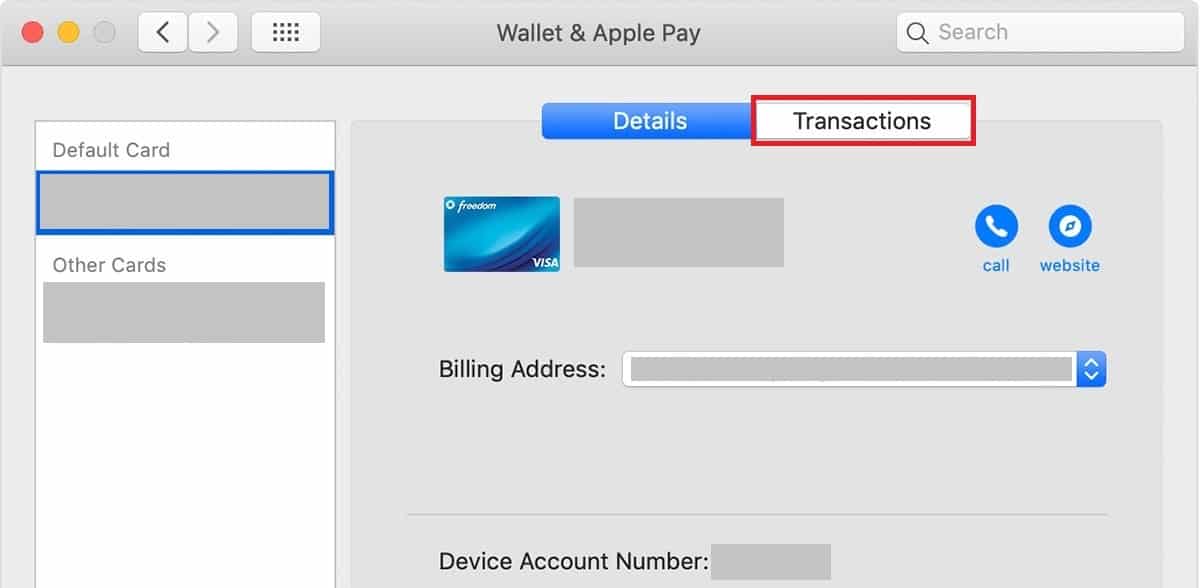
Step 3: Open the Transactions Tab
On the next screen, select the card to view its history, and then choose the Transactions tab to view all the transactions along with their details.
Remember that some of your Apple Pay transactions would look different. You may see transactions from various locations like hotels, restaurants, rental car companies, etc., or only the initial payment amounts. This difference will depend on your bank or card provider’s policy. For instance, a restaurant may request $199 for verification when you had a dinner of only $150 worth.
Always refer to your bank or card issuer’s credit or debit card statements to check the most authentic transaction record.
©History-Computer.com
How to See an Apple Pay History of Spending
You now know how to view your Apple Pay transaction history on your iPhone, iPad, Mac, and Apple Watch. But what if we tell you you can also access your spending history on Apple Pay? Well, you can!
Whether you want to control your food expenses or entertainment purchases, you can now easily do it with detailed tracking of your Apple Pay spending.
Here is how you can see the history of Apple Pay spending on your iPhone:
View Your Latest Purchases
- First, launch Wallet on your iPhone.
- Tap on your Apple Cash Card.
- The next screen will display a list of the Latest Card Transactions. Select any transaction to see the details.
- To view older purchases, scroll on the same screen where the month or year option is located. Tap on any to view the transaction.
Now, you can view the time, date, and the number of transactions you made. If you’re a member of the Apple Card Family, you can find the person behind the transaction. If any payment seems unidentified or suspicious, you should immediately report an issue or dispute a charge.
Find a Specific Payment
Your transaction list would be long if you frequently use Apple Pay for various purchases. So, finding a specific payment would be like looking for a needle in a haystack — challenging but not impossible!
Here is how you can search for a particular transaction:
- Open the Wallet on your iPhone.
- Then, tap on your Apple Cash Card.
- Select the Search bar and enter any unique transaction element. It could be location, category, location, date, transaction amount, etc.
If you’re a part of the Apple Card Family, you can easily see who initiated the transaction from this step.
Access Your Weekly/Monthly/Yearly Apple Pay Spendings
You can also organize your weekly, monthly, and yearly Apple Pay spending for better budget management. Follow the below steps to do it.
- Open the Wallet app on your iPhone.
- On the homepage, tap on the Apple Cash Card.
- The app will direct you to a page with the card’s balance. Select the Weekly Activity, Monthly Activity, or Yearly Activity option here.
- You can then select Week, Month, or Year to switch between them.
- Finally, right-swipe on the screen to see the Apple Pay history of your spending activity in the past week, month, or year, depending on which one you selected.
Apple Pay will also help you compare your weekly, monthly, or yearly spending based on the percentage change in the previous period. Spend some time to understand the trend in detail.
How to Manage Your Apple Pay and Apple Cash Card Activity
If you’re new to using Apple Pay, you may struggle to manage your Apple Cash Card and transactions in the Wallet app. The process is easy, but it can be a bit complicated in the beginning. The first thing you need to do when getting started with Apple Pay and Apple Cash Card is to connect with them with your Wallet. Once done, launch the Wallet app and see Apple Pay history in the steps discussed above.
To edit your account’s or card’s settings, follow the below steps to manage your Apple Pay and Cash Card activities.
View and Edit the Card Information
You can connect multiple debit or credit cards with your Apple Pay and Apple Card. Not only that, but you can also view and edit their information after successfully adding them.
Here is how to do it.
- Open the Wallet app on your iPhone and choose the card.
- Tap the More icon (or three dots) on your screen’s top right-hand side.
- Then, choose any of the below options to view and edit your card’s details:
- Card Number: You can access your card number’s last four digits and the Device Account Number.
- Card Details: You can view more information about your card, enable, or disable its transaction history, modify the billing address, or delete the card from your Wallet.
- Notifications: You can enable or disable the notifications.
Change Your Apple Pay Account Settings
You can also tweak your Apple Pay account’s settings according to your preferences. This way, you can better optimize and see your Apple Pay history on your iPhone.
Here is how you can play around with your Apple Pay settings.
- Open your iPhone’s Settings and tap Wallet & Apple Pay.
- Then, select any of the below options to change it:
- Double-Click the Home Button: If your iPhone has a Home button in the middle, you can double-click it to view the passes and cards linked to your Apple Pay account.
- Double-Click Side Button: If your iPhone has a Face ID and a side button, double-click it to see your connected passes and cards.
- Allow Payments on Mac: This option enables iPhone to confirm transactions on any Mac.
Remove Cards From Apple Pay
You should enable the Find My iPhone on your iPhone to quickly locate it if it gets lost or stolen. Meanwhile, though, you must remove the cards linked to your Apple Pay account as a security measure.
Here is how to do it.
- On Your Mac: First, log in with your Apple ID and navigate the Devices section. Click on the lost iPhone and then the Remove Items option from the Wallet & Apple Pay section.
- On a Different iPhone or iPad: Open Settings > tap your name > pick the lost iPhone > Remove Items.
You must also contact your card’s issuer in such cases. You can re-add the removed cards to your Apple Pay account whenever you recover your iPhone.
Wrap Up
One great feature of Apple Pay is that it lets users view their transactions and spendings history anytime. In fact, you can see your spending history based on the month, week, or year. This helps you stay within your monthly or yearly budget and make informed purchase decisions. Not only that, but you can also identify any suspicious activity or transactions initiated from your account and report them straight away.
To see Apple Pay history, simply launch the Wallet app on your iPhone, tap the Apple Cash Card or any other card, and the following screen will list all your recent transactions. Select any to view its complete details.
The image featured at the top of this post is ©LightField Studios/Shutterstock.com.