Whether you are just creating videos for fun or you are hoping to make a business out of making videos, an essential step is editing. If you are brand new to video creation, you might not have video editing software yet. Luckily there are some free options out there, including YouTube Studio.
YouTube Studio is pretty limited compared to other software, but it is perfect for simple cuts and trimming videos. If you are looking to create more complex videos, though, we highly recommend using dedicated video editing software. Unfortunately, most beginners do not have a lot of money to invest in software, which is why we will be going over Davinci Resolve. Not only is it free, but it is such a powerful tool that it has been used for studio-produced movies. Of course, there is also a premium version if you feel like you need it, but the free version gives you access to the same tools. Plus, there is no annoying watermark like other video editing software.
Editing Using Davinci Resolve
To start, you must first download and install Davinci Resolve. After that, you can either search for Davinci Resolve in your web browser or you can click on this link to take you directly there. This is just a brief overview of Dancinci Resolve to get you started making videos. If we went over all the possibilities with Davinci Resolve, we would be here for days.
1. Open Davinci Resolve
After you have Davinci Resolve downloaded and installed on your computer. Open the app and click on New Project. Then give your project a name.
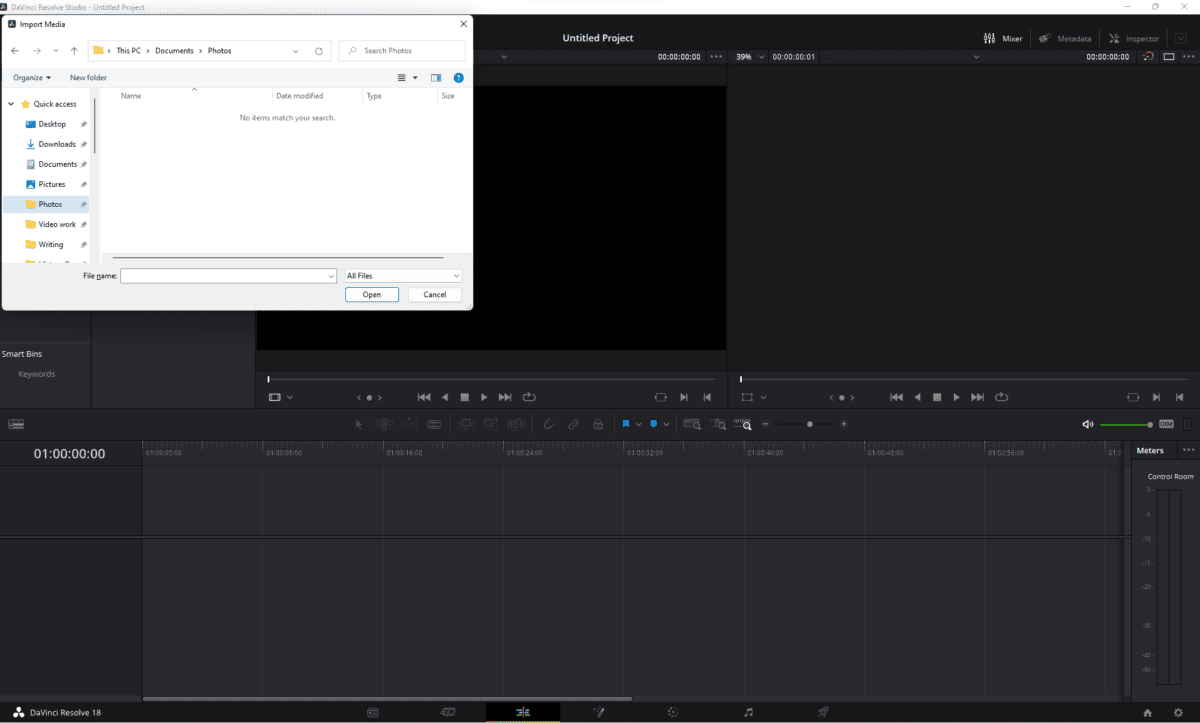
2. Import Media
Now that you have a New Project created, we need some footage to work with. You can either do this by clicking File>Import>Import Media. Or you can use the shortcut Ctrl+I on Windows and Cmd+I on Mac.
©History-Computer.com
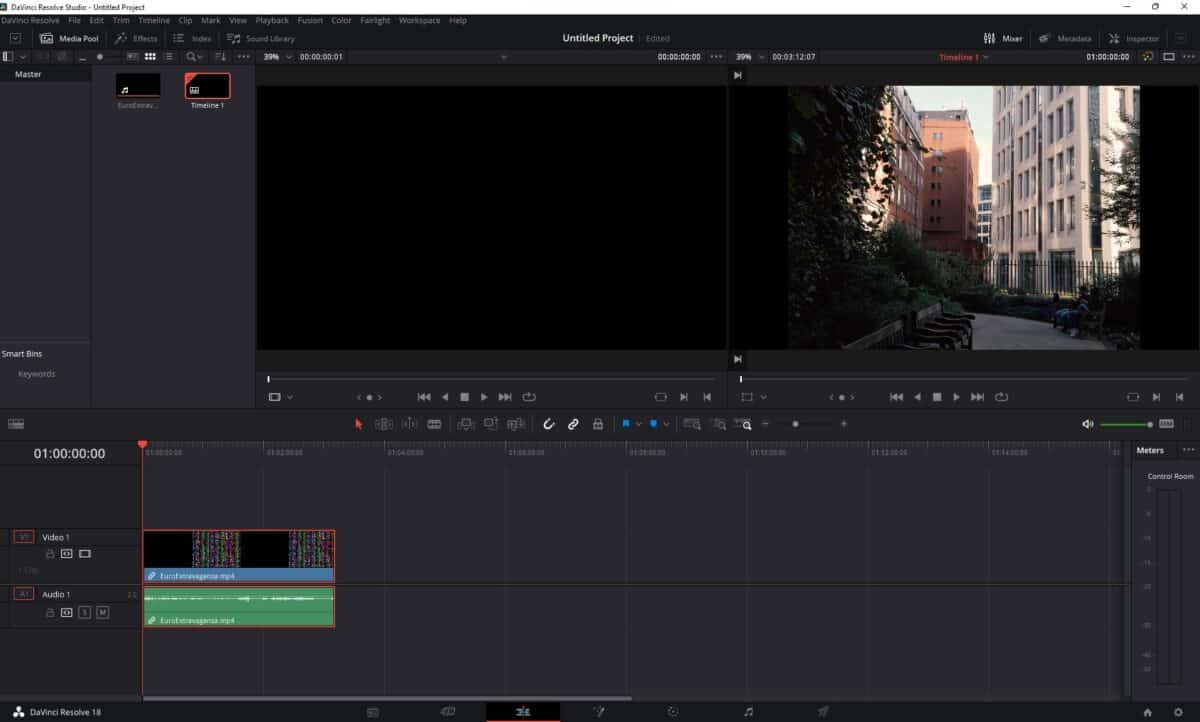
3. Drag Footage to the Timeline
There are 6 different workspaces in Davinci Resolve, but for this tutorial, we will be just focusing on the Edit page. With your footage imported, drag the first clip you want to use to the timeline.
If your footage is different than the default settings, dragging the footage to the timeline will make the timeline conform to your footage’s settings.
©History-Computer.com
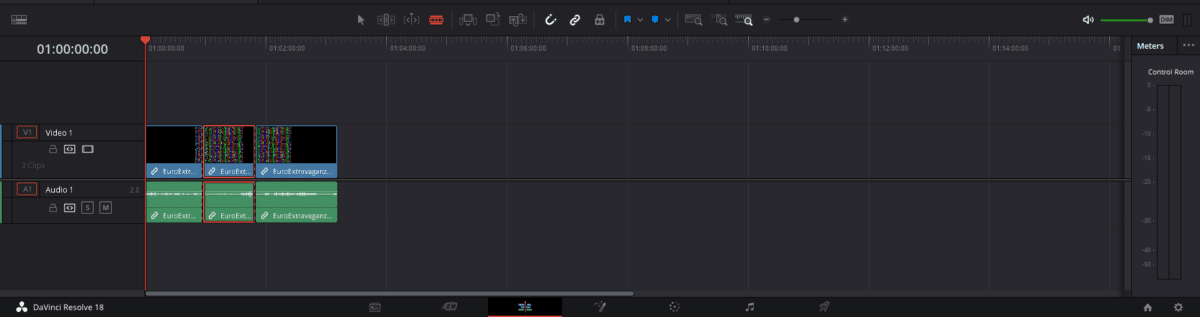
4. Cut and Trim Clips
Now you have the footage in your timeline. You are on your way to making a YouTube video. To trim the length of these clips, you can click and drag on either side of the clip to shorten the length of the clip.
To cut a clip, hit the B key on your keyboard to switch to the cut tool. Using your cursor, select where you want to start the cut and then click where you want the cut to end. With a clip cut out of your footage, hit Shift+Delete to get rid of that clip, and the clips on either side will move together, so there is not a black frame in the middle of your video.
©History-Computer.com
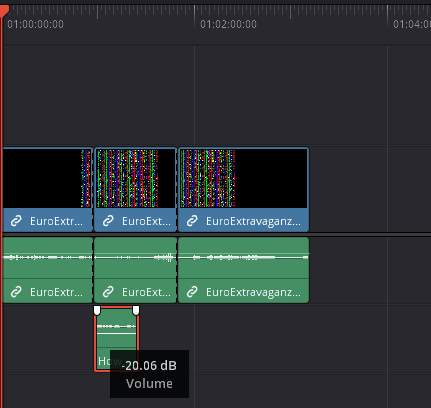
5. Adding Music or Secondary Audio Tracks
Importing music to Davinci Resolve is the same as adding footage, so follow step 2 again, and import the music you want to add.
Drag and drop your desired music from the bin into the timeline. To adjust the volume, hover your cursor over the audio until you see an upward and downward-facing arrow. To increase the audio, drag this up, and to lower it click and drag this line down.
©History-Computer.com
6. Exporting and Sharing Your Video
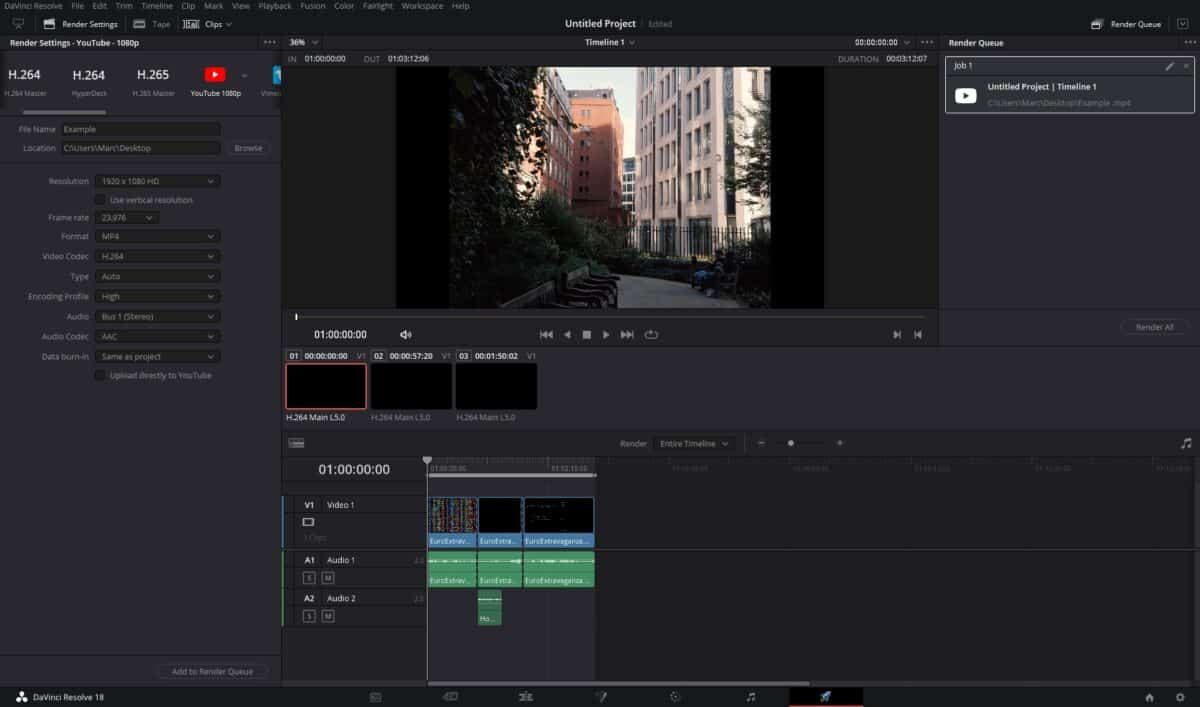
After you have your video edited to a point that you are happy with, it is time to export. Davinci Resolve makes this process very easy by having a YouTube preset. Click on the rocket icon in the bottom workspace toolbar to get to the Export page. It is the option to the far right.
In the Export tab, click on YouTube 1080p. You may have to scroll to the right to see this option. Here you can create a file name for your edited video and choose where it will be saved on your computer. When you have your settings to your liking, click Add To Render Queue. Then click Render All to the far right of the page, below the Render Queue.
©History-Computer.com
Click the video below to learn how to edit a video with DaVinci Resolve:
Editing Using YouTube Studio
YouTube Studio is a free editing service that you can access through a web app instead of downloading a whole program. For those reasons, it makes it super simple for video creators just starting out.
1. Navigate to YouTube Studio
On the web browser of your choice, navigate to YouTube Studio, or you can click on this link to take you directly there.
2. Upload a Video
To start editing, you have to upload at least one video file. To do this, click on Create and then select Upload Video.
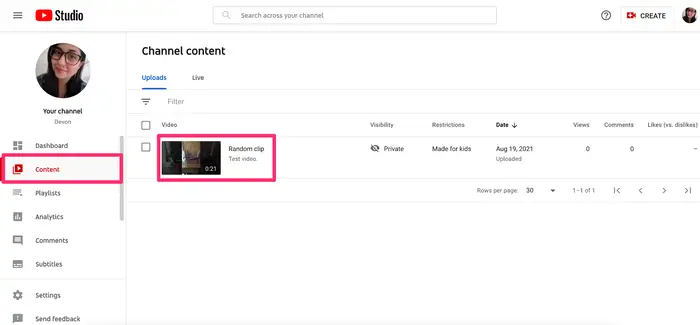
3. Click Content
Now that you have a video uploaded click on the Content option on the left-hand menu.
©History-Computer.com
4. Select the Video You Want to Edit
On the Content page, click on the video you want to edit.
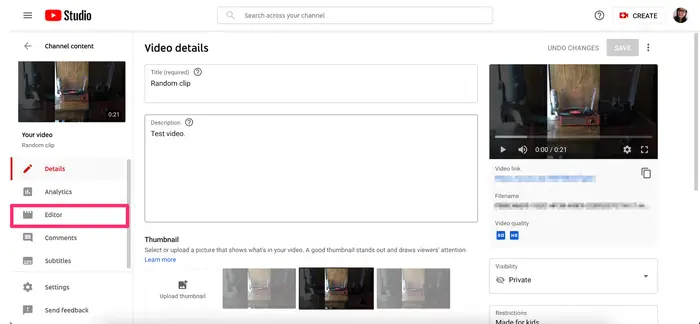
5. Click Editor
Now on the left-hand menu, you will see a different list of options. Click on the Editor option, and then click on Get Started to open up the Editor.
©History-Computer.com
6. Tools Available
There are 2 main tools available in the YouTube Editor. We have listed those below. To switch between these tools, click on whichever one you want to use.
- Trim & Cut
- Blur
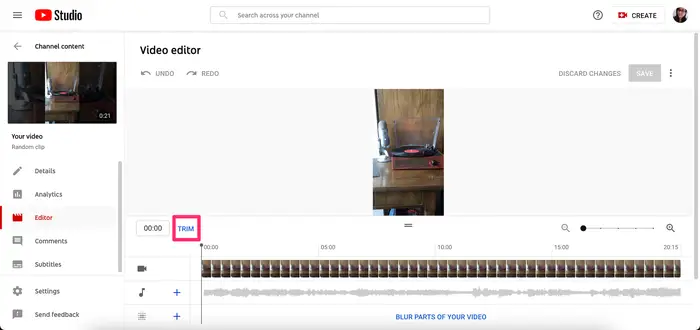
7. How To Use Trim
Trim & Cut is probably the tool you will use most of the time inside YouTube Studio. Trim will allow you to do just that. You can trim the beginning and end of the video using this tool.
When Trim is selected, you will see a blue bar surrounding the video. To trim the start of the video, drag the blue bar from the front to the right. To trim the end of the video, click on the blue bar at the end and drag it to the left.
When you are done with your edits, click on the Save button in the top right corner of the page.
©History-Computer.com
8. How To Use Cut
The Cut tool works fairly similarly to the Trim tool, but instead of the whole video, you can cut a part of the video out of the middle of the clip.
To start cutting, click on New Cut from inside the Trim & Cut tool. After clicking on this, a red outline will appear around a section of your video.
Move this box around to find the section you want to cut. Then, using the bars on either side of the box, you can lengthen or shorten the size of this Cut by clicking and dragging them towards or away from each other. After you get the Cut to a point you like, click on the check mark to make the cut official.
©History-Computer.com
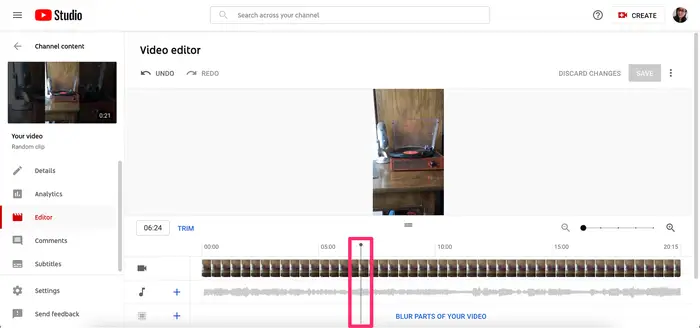
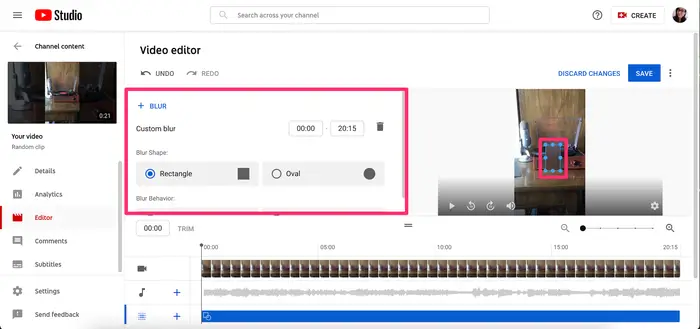
9. How To Use Blur
Using Blur, you can blur parts of your video with a custom or face blur option. For Face Blur, the Studio will find faces in your video, and you’ll be able to select the ones you want to blur from there and then hit Apply.
For the Custom blur, click and drag the blur box that appears in the preview window and adjust the timing, shape, and blur behavior on the left side of the blur window.
When you have the blur to a point you like, click Save in the top-left corner.
©History-Computer.com